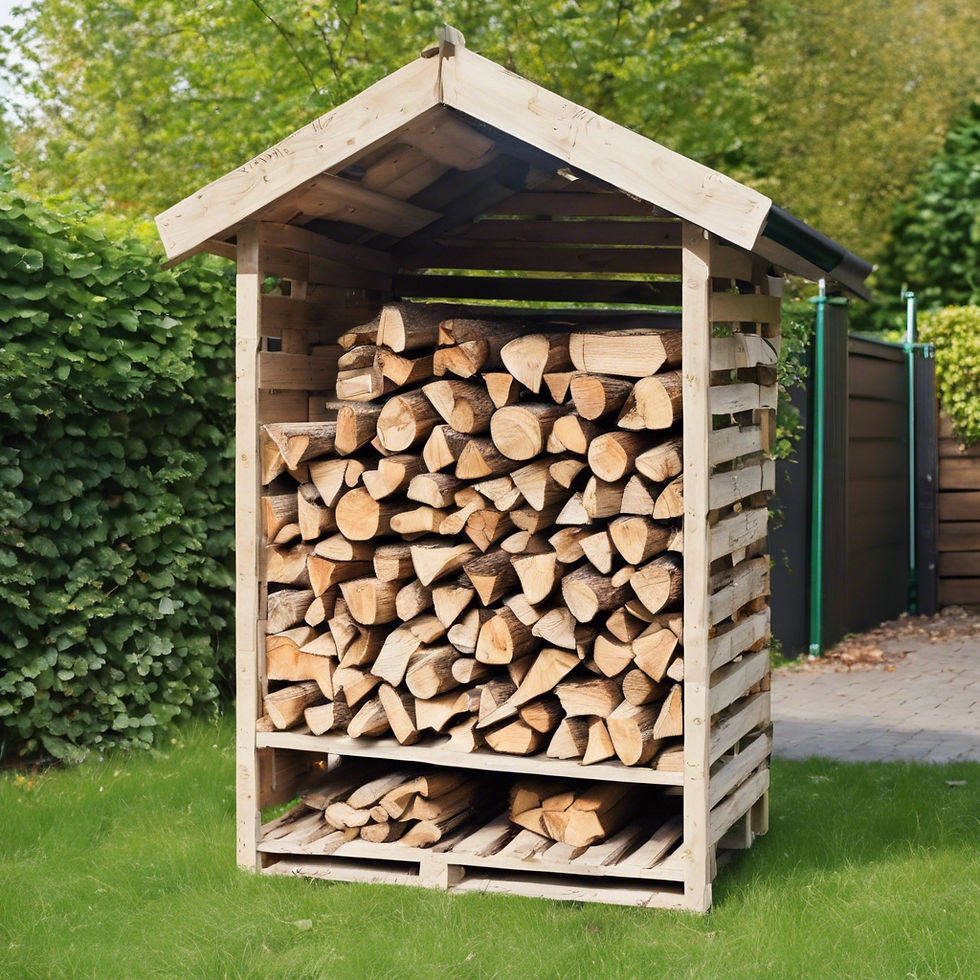
🔥 DIY Guide: Build a Cheap & Durable Firewood Store from Pallet Wood 🪵💰
- DeclanChandler

- Nov 10, 2024
- 4 min read

✅Materials Needed 🔨✏️
Pallets: Look for good-quality pallets in similar sizes. Six to eight should be sufficient for a medium-sized store, with some for the base, walls, and roof support.
Wooden Planks or Scrap Wood: Use additional wood if any structural reinforcements are needed.
Saw (Handsaw or Electric Saw): To cut the pallets or additional wood to size.
Drill and Screws: Screws provide more durability than nails, especially in outdoor conditions. Galvanized screws are ideal to prevent rust.
Hammer and Nails: Useful for securing the structure if screws are unavailable.
Sandpaper or Power Sander: For smoothing rough surfaces and preparing the wood for staining.
Weatherproof Wood Stain or Sealant: Protects against rain, mould, and UV damage.
Roofing Material: Corrugated plastic or metal sheets provide great water resistance. If using tarpaulin, make sure it’s heavy-duty.
L-Brackets or Corner Brackets (Optional): Provide extra stability for wall connections.
Step 1: Choose and Prepare the Location 🔍
Choose a Dry, Level Location: Look for a slightly elevated area where rainwater won’t pool. Ideally, place the store near a wall or fence for additional wind protection.
Ensure Easy Access: Position the store where you can easily load and unload firewood, keeping in mind any movement of a wheelbarrow or trolley.
Step 2: Preparing the Pallets 🪚
Select Good-Quality Pallets: Choose ones that are free of major cracks, nails sticking out, or heavy signs of rot.
Sand the Pallets: Use coarse-grit sandpaper (60-80 grit) to smooth any rough spots, especially around edges, to avoid splinters.
Inspect for Pest Infestations: Check for signs of wood-eating pests (like termites) and discard any affected pallets.
Step 3: Building the Base 👷♂️
Lay Out the Base Pallets: Arrange two or more pallets side-by-side to create the floor of the store. This elevated base allows airflow under the firewood, which keeps it dry.
Connect the Pallets: Drill pilot holes to prevent wood splitting, then use screws to connect the pallets securely.
Ensure Stability: Test for wobbling and reinforce any weak areas with additional wood planks, screwing them into the base if needed.
Step 4: Constructing the Back Wall 🧱
Align the Back Pallets Vertically: Place one or two pallets vertically along the back edge of the base, depending on how tall you want the store to be.
Secure to the Base: Drill through the base pallet into the bottom of the back pallet and secure with screws.
Reinforce as Needed: If the pallets are slightly unsteady, reinforce the wall by attaching wood planks diagonally across the back of the pallets. This will create a more rigid frame.
Step 5: Adding the Side Walls 🪛
Position the Side Pallets: Place one pallet on each side of the base, ensuring they’re level and aligned with the back wall. This will help create a square structure.
Attach to the Base and Back Wall: Drill screws from the base into the bottom of each side pallet. Attach each side pallet to the back wall pallet as well.
Use L-Brackets for Extra Stability (Optional): Attaching L-brackets at the corners will reinforce the connections between the back and side walls.
Step 6: Building the Roof Frame 🛖
Cut Planks to Fit the Top of the Walls: Measure the width of your structure and cut two wooden planks to create a frame across the top.
Attach the Planks: Screw one plank to the tops of the side walls and another to the back wall to create a stable roof frame.
Check Stability: Ensure the roof frame is level and secure. This frame is essential for supporting the roof material and should be firmly attached.
Step 7: Adding the Roof ✅🛖
Prepare the Roofing Material: Measure the roof area and cut the roofing material with a slight overhang (3-4 inches) on all sides to protect against rain.
Attach the Roofing Material:
For Corrugated Plastic/Metal: Drill screws with washers into the roofing material, securing it to the top frame. Space the screws evenly to prevent sagging.
For Tarpaulin: Stretch it tight over the frame, staple or nail it securely to the wood, ensuring it’s taut and won’t sag with rain.
Seal the Edges (Optional): Apply waterproof sealant along the edges of the roof where it meets the frame to prevent leaks.
Step 8: Adding Front Supports (Optional) 💪🏼
If your store is tall or if you want added stability, cut small pieces of wood to act as front supports.
Attach them vertically at the front corners for additional structural integrity.
Step 9: Apply a Weatherproof Finish 💦🚫
Choose a Weatherproof Stain or Sealant: Use a high-quality outdoor wood stain or sealant to protect against moisture, mold, and UV damage.
Apply with a Brush or Roller: Apply at least two coats, allowing each coat to dry fully before adding the next. Pay extra attention to the roof frame and exposed edges.
Step 10: Stack Your Firewood Properly 🪵🪵🪵🪵🪵
Place Logs Loosely: Stack firewood loosely within the store, as air circulation is essential for drying.
Organize by Size: Place larger logs on the bottom and smaller kindling or split wood on top, making it easy to access different sizes when needed.
Leave Gaps for Ventilation: Avoid stacking the wood directly against the walls, as airflow around the wood is critical for preventing mould
Additional Tips
🔥Check Regularly for Maintenance Needs: Inspect the structure periodically, tightening screws, applying fresh stain, and checking the roof material for leaks.
🔥Consider Adding Doors (Optional): If you want a fully enclosed structure, you can add hinged doors made from additional pallets or planks for added weather protection.


Comments